Your cart is currently empty!
How to Install Fungate
This guide is still under development. Use the Chat Icon at any time to get connected to Live Support.
Step 1:
Download fungate.zip from the Github repository.
Step 2:
Navigate to the Plugins tab on the WordPress admin dashboard
Step 3:
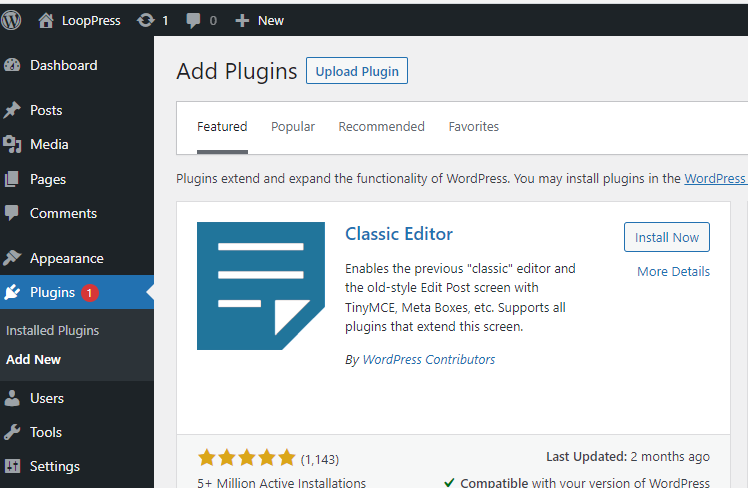
Click the “upload plugin” button and select the fungate.zip file that you downloaded in Step 1.
Click install, and after it is installed, click activate.
That’s it for installation! Now let’s move on to Configuring the Fungate Settings.
Step 4:
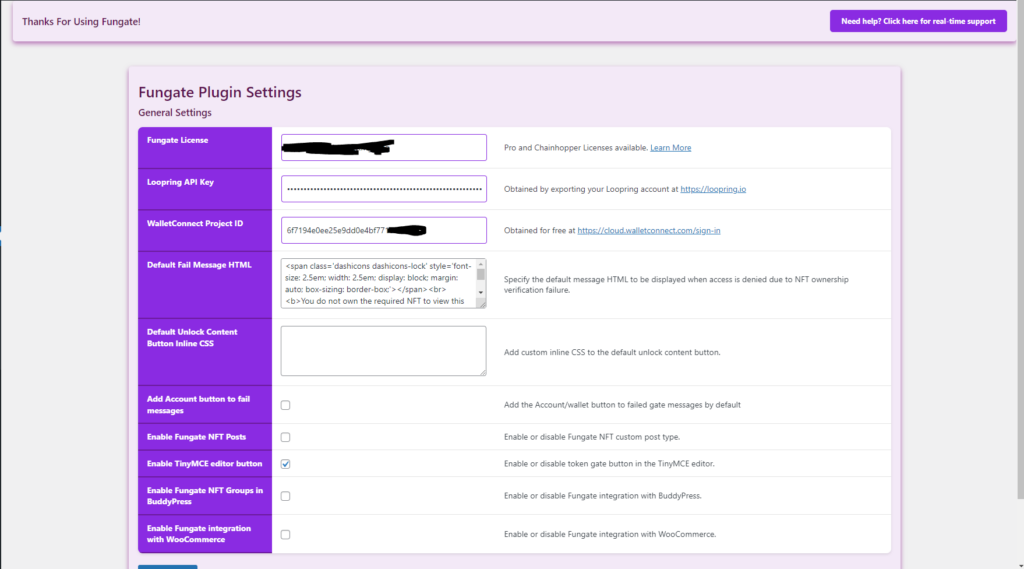
Navigate to the fungate -> settings page on the admin dashboard.
Step 5:
Now it’s time to add your Loopring API key or input a Chainhopper License.
If you add a Chainhopper license, then skip to Step 7.
I recommend creating a fresh Loopring account for your website as an extra security precaution. How to Export Loopring Api Key.
Step 6:
Paste the API key into the Loopring API Key field in the fungate settings.
Step 7:
Now it is time to obtain a WalletConnect Project ID. Do this by creating a Free account here
Step 8:
Once you have created a WalletConnect account and created a Project ID for your website, copy it and navigate back to the fungate settings page.
Step 9:
Paste the Project ID into the WalletConnect Project ID field on the fungate settings page.
Click Save to save the settings. Now fungate is installed and ready to go!
You can now use the Fungate Post Type, Roles, Web3 Login, and the fungate shortcodes!